
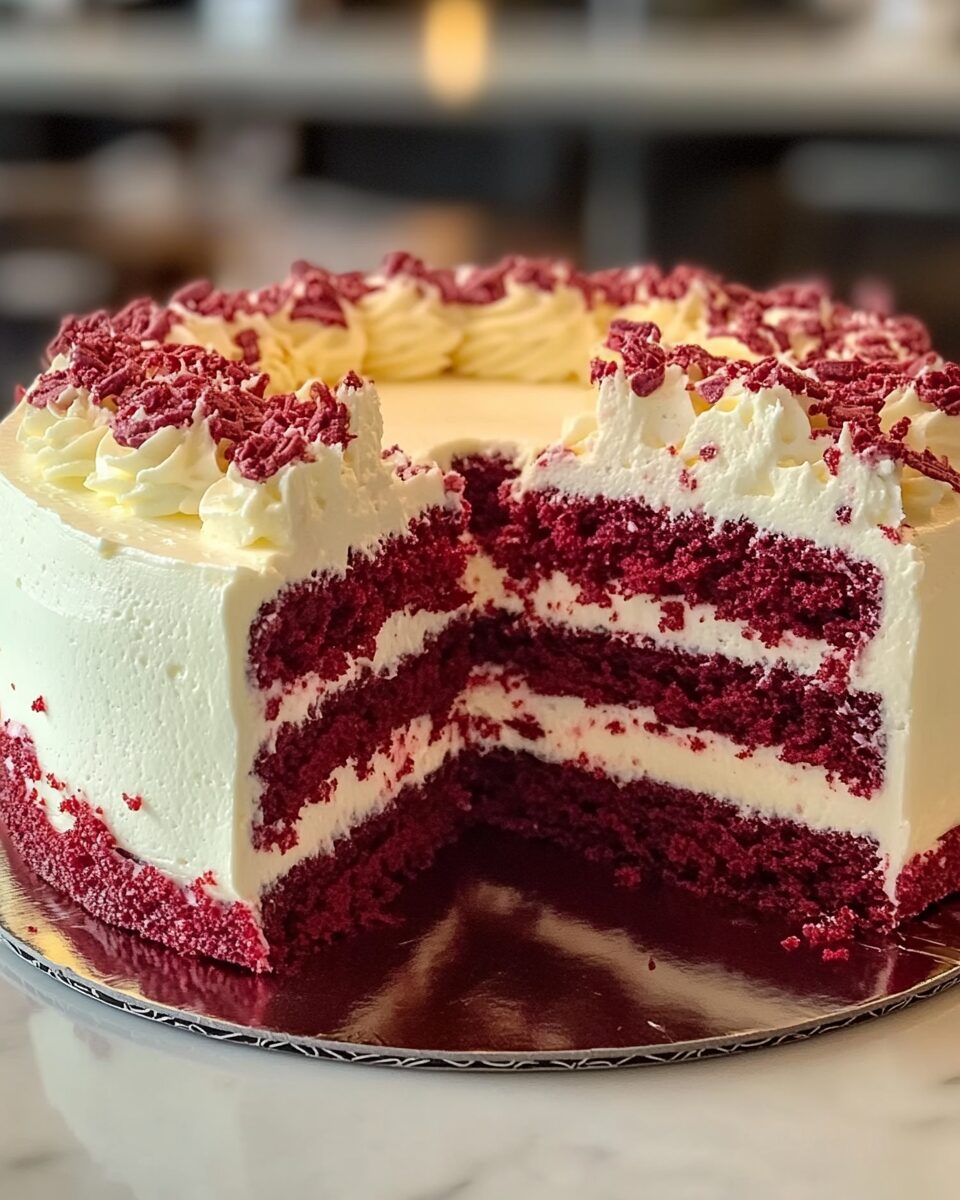
Red Velvet Cake is the epitome of classic elegance, with its striking red color, subtle cocoa flavor, and velvety texture. Topped with a luscious cream cheese frosting, this cake offers the perfect balance of sweetness and tanginess that melts in your mouth.
This cake is not only a treat for the taste buds but also a feast for the eyes. Its vibrant hue and beautifully layered design make it a showstopper for any occasion—birthdays, anniversaries, or simply a cozy dessert moment at home. It’s a timeless dessert that everyone loves.
Full Recipe:
Ingredients:
- 2 ½ cups (320g) all-purpose flour
- 1 ½ cups (300g) granulated sugar
- 1 teaspoon baking soda
- 1 teaspoon salt
- 1 teaspoon cocoa powder
- 1 ½ cups (360ml) vegetable oil
- 1 cup (240ml) buttermilk, at room temperature
- 2 large eggs, at room temperature
- 2 tablespoons (30ml) red food coloring
- 1 teaspoon vanilla extract
- 1 teaspoon white vinegar
- 1 ½ cups (360g) cream cheese, softened
- 1 ½ cups (180g) powdered sugar
- 1 teaspoon vanilla extract (for frosting)
- ½ cup (120ml) heavy whipping cream
Directions:
- Preheat the oven to 350°F (175°C). Grease and flour two 9-inch round cake pans or line them with parchment paper.
- In a large mixing bowl, sift together the flour, sugar, baking soda, salt, and cocoa powder.
- In another bowl, whisk together the vegetable oil, buttermilk, eggs, food coloring, vanilla extract, and vinegar.
- Gradually add the wet ingredients to the dry ingredients and mix until just combined. Do not overmix.
- Divide the batter evenly between the prepared cake pans and bake for 30-35 minutes, or until a toothpick inserted into the center comes out clean.
- Let the cakes cool in the pans for 10 minutes before transferring them to a wire rack to cool completely.
- To make the frosting, beat the softened cream cheese with powdered sugar and vanilla extract until smooth and creamy. Slowly add the heavy whipping cream and whip until the frosting reaches a spreadable consistency.
- Spread frosting between the cake layers and over the top and sides of the cake. Slice and serve.
Prep Time: 20 minutes | Cooking Time: 35 minutes | Total Time: 55 minutes
Kcal: 450 kcal per slice | Servings: 12 slices
History and Origin
Red Velvet Cake has an intriguing history. Its origins trace back to the Victorian era when velvet cakes were a luxurious treat served at high society events. The “red” in Red Velvet Cake was initially a result of the reaction between natural cocoa powder and acidic ingredients like vinegar and buttermilk, giving it a reddish hue. Over time, food coloring was introduced to enhance its vibrant appearance, turning it into the iconic red cake we know today.
In the United States, the cake gained immense popularity during the mid-20th century, with the Waldorf Astoria Hotel in New York claiming to have popularized it. It’s now a beloved dessert for celebrations, particularly during Valentine’s Day and Christmas, due to its festive red color.
Pro Tips for Perfecting Your Red Velvet Cake
- Choose Quality Ingredients: Use high-quality cocoa powder, vanilla extract, and food coloring to ensure the best flavor and presentation.
- Room-Temperature Ingredients: For a smoother batter, make sure your eggs, buttermilk, and cream cheese are at room temperature.
- Don’t Overmix: Stir the batter just until the ingredients are combined to avoid a dense cake. Overmixing can also affect the cake’s rise.
- Measure Properly: Use a kitchen scale for precise measurements, especially for flour. Too much flour can make the cake dry.
- Use Parchment Paper: Line the bottom of your cake pans with parchment paper to prevent sticking and ensure easy release.
Serving Suggestions
- Classic Presentation: Serve your Red Velvet Cake as a layered masterpiece with swirls of cream cheese frosting and garnish with fresh berries or cake crumbs.
- Individual Portions: Bake the batter in cupcake molds for perfectly portioned treats.
- Creative Twist: Add a layer of white chocolate ganache between the cake layers for extra decadence.
FAQs About Red Velvet Cake
Q: What makes Red Velvet Cake different from a regular chocolate cake?
A: While both cakes use cocoa powder, Red Velvet Cake has a unique texture and flavor due to the buttermilk and vinegar combination. It’s less chocolatey than traditional chocolate cake and has a tangy, creamy finish, thanks to the cream cheese frosting.
Q: Can I make this recipe without food coloring?
A: Yes! While the vibrant red color is iconic, you can omit the food coloring for a more natural reddish-brown hue from the cocoa powder reaction with the acidic ingredients.
Q: How can I store Red Velvet Cake?
A: Store the cake in an airtight container in the refrigerator for up to 5 days. Allow it to come to room temperature before serving for the best flavor.
Variations to Try
- Gluten-Free Version: Substitute all-purpose flour with a gluten-free baking blend for a cake that everyone can enjoy.
- Vegan Red Velvet Cake: Replace eggs with flaxseed meal mixed with water, use plant-based buttermilk (almond milk + vinegar), and opt for vegan cream cheese frosting.
- Red Velvet Cheesecake: Add a layer of cheesecake between the cake layers for an indulgent dessert.
Why is Red Velvet Cake So Special?
Red Velvet Cake stands out for its velvety texture and balanced flavor profile. Unlike other cakes, it’s not overly sweet or intensely chocolatey but has subtle cocoa undertones complemented by a tangy note from buttermilk and vinegar. The real charm lies in its striking red color, which makes it a visual showstopper and a favorite for celebrations like birthdays, Valentine’s Day, and Christmas.
The signature cream cheese frosting adds a creamy, tangy finish, perfectly balancing the sweetness of the cake. This combination of taste, texture, and visual appeal makes Red Velvet Cake an all-time favorite.
Key Ingredients and Their Roles
- Cocoa Powder: Provides the subtle chocolate flavor. Use natural cocoa powder for the classic red hue.
- Buttermilk: Adds tanginess and moisture to the cake, ensuring a tender crumb.
- White Vinegar: Reacts with baking soda to help the cake rise while also enhancing the red color.
- Red Food Coloring: Gives the cake its iconic, vibrant red appearance.
- Cream Cheese Frosting: The rich, tangy frosting is the perfect complement to the cake’s delicate sweetness.
Tips for Perfect Layers
- Level the Cakes: Once baked, use a serrated knife to trim any domes on the cake layers. This ensures a flat, even surface for frosting and stacking.
- Chill the Cake Layers: After baking, refrigerate the layers for 30 minutes before frosting. Chilled layers are easier to frost and less prone to crumbling.
- Crumb Coat: Apply a thin layer of frosting (crumb coat) to trap crumbs before adding the final frosting layer.
Red Velvet Cake Fun Facts
- Color Evolution: Early versions of Red Velvet Cake were naturally reddish-brown due to the chemical reaction between cocoa powder and acidic ingredients. The use of red food coloring became popular later to enhance its appearance.
- Celebrity Status: Red Velvet Cake gained popularity in the 1940s and 1950s, thanks to its association with the Waldorf Astoria Hotel and its appearances in movies and advertisements.
- Cake of Love: Its bold red color often symbolizes love and passion, making it a popular choice for romantic occasions.
Customizing Your Red Velvet Cake
- Nuts for Texture: Add crushed pecans or walnuts to the batter or sprinkle them on top of the frosting for a crunchy element.
- Layer Variations: Try making a four-layer version for a more dramatic presentation, or bake the batter in a Bundt pan for a unique twist.
- Extra Flavor: Add a teaspoon of espresso powder to enhance the cocoa flavor without overpowering the cake.
Perfect Pairings
- Beverages: Serve Red Velvet Cake with a hot cup of coffee, black tea, or even a glass of milk for a comforting pairing.
- Ice Cream: A scoop of vanilla or cream cheese-flavored ice cream adds a delightful chill and creaminess.
- Fresh Berries: Raspberries or strawberries complement the tangy frosting and enhance the overall flavor.
Storage and Shelf Life
- Refrigerator: Store the cake in an airtight container in the fridge for up to 5 days. The cream cheese frosting keeps best when refrigerated.
- Freezing: You can freeze unfrosted cake layers wrapped tightly in plastic wrap for up to 3 months. Thaw at room temperature before frosting.
Troubleshooting Common Issues
- Cake Too Dense: Make sure not to overmix the batter, as this can develop too much gluten and result in a dense texture.
- Dry Cake: Ensure the correct measurement of wet ingredients and avoid overbaking. Use a toothpick to check for doneness and remove the cake as soon as it comes out clean.
- Uneven Layers: Rotate the pans halfway through baking to ensure even heat distribution, especially in older ovens.
Conclusion
Red Velvet Cake is a timeless dessert known for its vibrant red color, velvety texture, and perfect balance of sweetness and tanginess. It’s the ultimate choice for any occasion, from cozy gatherings to grand celebrations. With the tips and insights shared here, you can create a show-stopping cake that delights both the eyes and taste buds. Bake, share, and enjoy this classic treat with loved ones!